Feeds:
Posts
Comments

Archive for the ‘Dumpster Divin'’ Category

Here is all the food I pulled out of my new favorite dumpster!!

Here is all the food I pulled out of my new favorite dumpster!!

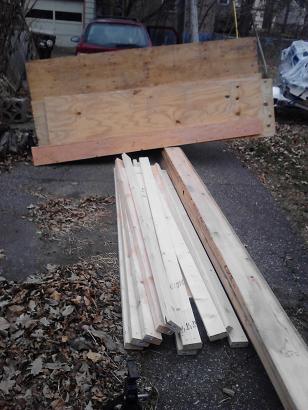
Last winter I wrote an essay entitled The Tragedy of a Disposable Culture.  It was inspired by my observations of a world gone mad by garbage and a particularly good dumpster score at a construction site.  I ended up pulling out a bunch of 8 foot 2x4s, 2x12s, ½ by, 8 foot sections of plywood and other random, but useful materials.  Some of that lumber has been used in beehive equipment and a lofted bed for my son, while the rest awaits a future project of some kind to manifest itself.

My days as a dumpster diver started in earnest back when I was 19.  As a poor college student who excelled at missing class due to environmental activism, joint rolling, and hangovers, I had plenty of time to explore the small college town I was living in.  On the north end of town there was a grocery store that kept an unlocked dumpster.  I stumbled upon it one night and felt like I had hit a jackpot.  Inside the dumpster were pre made veggie platters, bagels, and bags of apples.

Being the good vegetarian I was back then, this was a great find.  I loaded myself up with as much as I could carry and headed back to the dorm to figure out how to proceed.  I got my friend Chris to join me, and we headed back up to the dumpster with some bags, warm coffee, and a joint we shared together underneath the stars.

That night we made it our mission to liberate as many of those goodies as we could; not only feed ourselves, but to feed as many other college kids as we could find.  We loaded up the veggie platters and apples, and also realized there was a whole garbage bag worth of bagels for the taking.  Without hesitating, everything that could be salvaged was, and we headed back.

As we entered into the main part of the campus, enough people were out walking around (it must have been a Friday or Saturday night) that we decided to just start handing out the bagels.  Some people thought we were nuts, but most (being poor college students like ourselves) were grateful for some free food to go along with their beer.  We nearly emptied the bag in less than an hour!

The next day I gorged myself on veggies and finished the apples, and with what I couldn’t eat fresh, I turned the excess produce into a big stew that contained broccoli, cauliflower, and carrots – nothing had ever tasted so good as that dumpster stew!  For the remainder of that year in Wisconsin I would often visit the dumpster.  Some days were better than others, but I usually came away with at least a snack to tide me over in those lean days of my failed attempt at higher education.

And so that is how I got my start diving into dumpsters.  Since those days back in Wisconsin, I have a hard time passing a dumpster without peeking my head in to see what might be hiding down in the deep, dark, and sometimes stinky depths.  Most times it is just truly garbage, but on those rare occasions something great is procured – romex wiring and brand new electrical plug-in boxes, boxes of nails, a whole universe of dimensional lumber, box fans, books, extension cords, a multi-tool, cleaning supplies,  and five gallon buckets have all been found in my local dumpsters and back alleys.  But it hasn’t been since the glorious food dumpster in college that I have had luck in finding high quality food for the taking, that is until yesterday!

Yesterday I was doing a bit of grocery shopping at a store that is fairly new to us and our area.  While it is not a store I typically shop at, I was intrigued by a flyer we had received with the Sunday paper and thought I would check it out.  Surprisingly, the prices are pretty affordable, and if you are an ingredients list reader like I am, most of the products I was interested in purchasing contained a short ingredients list that I could read and pronounce all of the words contained in the list with no problems!

I got the small amount of items I had set out for, but was amazed by a few things I noticed while walking the aisles.  Almost all of the fresh produce is over packaged – snow peas laid out on a foam tray wrapped up in plastic, individually wrapped cukes, two tomatoes to a tray – you get the picture.  Upon seeing this, my mind flashed backed to the dumpster of glory I talked about earlier – that dumpster contained the same kinds of things, over packaged produce that was still good for eating, and lots of it.

I paid for my items, and decided right then and there to see if my suspicions were correct.  I pulled my small car around to the back of the strip mall, found the proper dumpster, and casually went and stuck my head in.  WOW!!  Not only were my suspicions correct, they were exceeded by what I saw in there!  Snow peas, bunches of celery, cabbage, citrus, and a tray of multi-colored bell peppers that were just out of reach.

Being that it was the middle of the day and well past 90 degrees, I quickly grabbed what was within arms reach and got out of there.  Checking for cameras as I left (which I couldn’t find), I felt secure about going back later in the night to check back in on the dumpster.  On that first trip I left with a perfectly good head of cabbage, a few trays of the aforementioned snow peas, and celery.  Because of the heat I ended up feeding the peas and the celery to the chickens, but still a good use of otherwise unwanted food – spoiled veggies turned into egg protein!

As day turned into night and I finished my evening chores, I suited up in working clothes, put on my boots, grabbed a flashlight and a couple of buckets and headed back to the dumpster.  This trip was even better!  I ended up leaving with 8 pints of grape tomatoes, a bunch of organic bananas, 3 oranges, and more celery.  I was stoked!

With the tomatoes we are going to make a salad with mozzarella balls, and basil from the garden, and salsa using cilantro and purple jalapenos from the garden as well.  The bananas, just slightly soft to eat fresh are going to be turned into banana bread with some sunflower seeds in it, the cabbage is most likely going to get fermented into a small batch of kraut, the oranges are perfect for eating by themselves as is, and once again the celery went to the chickens.  What a great abundance of food that otherwise would have been tossed into the landfill.

It breaks my heart knowing that this dumpster is filled with food almost everyday.  What is even worse, is that there are millions of other dumpsters just like it around the world.  Lucky are the ones that are not kept under lock and key and compaction, but most are.  So really, the crisis of kids going to bed hungry, and people not knowing where they are going to get their next meal is not a matter of there not being enough food, but a problem of distribution.  If a company can’t make money off of the product, it is easier to just toss it, rather than offering it to food shelves and kitchens or directly to the people.  This is insanity, and it is wrong!

FNBWhile this topic is too big for me to tackle in one small essay, there are solutions to this problem of distribution.  The group Food Not Bombs who I used to work with back in my punk rock days is one of these solutions.  Founded in Massachusetts in the early ‘80s by anti nuclear activists, Food Not Bombs has grown into a worldwide movement of independent collectives that serve free vegan and vegetarian meals at rallies, protests, and impromptu gathering.  Lots of the food that FNBs uses is dumpstered and donated, and then cooked up and offered for free to anyone who is hungry.

Food Not Bombs, along with many other groups that have similar intentions, are fixing that distribution issue.  Just like in Permaculture where we can take the problem and turn it into the solution, FNBs is liberating perfectly edible food from dumpsters and feeding those who are in need of a good, wholesome meal.  Not only is this act one of compassion towards our greater community, it is also a shot across the bow of the corporate, food elites.  It is taking the food back to where it belongs, in people’s stomachs regardless of who they are or how much money they have to their name.

It is hard to imagine what the possibilities might be if all the food that can be found in dumpsters – fruits and veggies, packages of cheese, and crates of olive oil (just to name a few) were to make it into the hands of the people who need it the most.  What would happen if everyone went to bed with a satisfied belly?  What would happen if we no longer equated the ability to eat with how much money you earn?  What amount of resources could be saved if we ate all this food (or at least fed it to livestock or even composted) instead?  These are questions we can ponder all we want, but in reality it comes down to one thing – If you have access to a dumpster(s) like this, take full advantage of it.

Take what you can and eat it yourself.  Experiment with recipes using what you have on hand.  In the case of the cabbage, practice preservation techniques like fermentation.  Or if you find a bag of lemons, preserve them in salt or make lemonade.  The possibilities are endless.  If you find more than you can use or preserve, share it with friends or family.  If you have a local chapter of Food Not Bombs, or some equivalent organization, donate the food to them and even better, volunteer and get involved (This is something I need to start doing again as well).  And if you have produce that is not fit for human consumption, feed it to your chickens or other livestock.  Novella Carpenter, in her book, Farm City describes how she fed her two urban hogs a diet of dumpstered fish parts, peaches, and other produce that Bay Area residents discarded on a daily basis.  Whatever you decide to do with your dumpstered food, the important thing is removing it from the waste stream and keeping it out of the landfill.

As for me, I plan on visiting this new dumpster a few times a week.  While my family is not starving from a lack of food, I plan on taking full advantage of this resource and using it in conjunction with our garden produce and eggs from our chickens.  I have no qualms about eating produce or other grocery items out of a dumpster, and if I can cut down on my monthly food costs, and fill up my larder at the same time, even better.  And if I come across someone in need in my community, I am going to share this little secret of mine with them so they can reap the benefits of this magical dumpster as well!  Peace & Cheers

Read Full Post »

Here is the first nuc I installed!

Here is the first nuc I installed!

Good news!  Two Friday nights ago the universe answered my plea for help in locating a new source of honey bees.  After having quite a bit of trouble with a beekeeper that I had made arrangements with back in January (things like phone calls and emails not being returned, and a general lack of professionalism), I located, and received bees all in the same day from someone different.  Maybe the stars were aligned, or some other form of hocus-pocus played a part in this wonderful coincidence, but all I know is that I now have 3 colonies of Carniolan bees!

After the aforementioned problems with the first beekeeper, I started looking elsewhere for another source.  I felt it was getting too late in the season to find bees, but lo and behold, I found someone through Craigslist selling 5 frame nucs for $100 a piece.   I sent out an email and also left a facebook message and went on with my business for a Friday afternoon – drinking a few beers with my buddy John while shootin’ the shit and talking about gardens.

Around 3:30 or 4:00 I ended up getting a phone call from Sarah Rushfeldt, owner of Rushfeldt Apiary out of Dresser, WI.  She gave me all the details about what she had to offer, and it also just so  happened that she was driving up to Minneapolis that same night and I could pick my bees up then.  I couldn’t believe it!  Not only did I secure a new supplier of nucleus colonies, I was practically getting them delivered to me – double score!!

We arranged a pick up time of after 8:30 PM.  I had my work cut out for me, as I was nowhere near ready for three colonies of bees that would be arriving here in only a few short hours, but I knew I could figure it out.  John and I finished our beers, said our farewells, and I got to work.  I knew I wanted them towards the back of the lot near my driveway, so that was simple enough.

Next I gathered up the materials I would need for a heavy duty hive stand that could support the weight of up to four full colonies (remember – I have two swarm traps out in a friends beeyard).  After many hours spent watching youtube videos of JP the beeman and other beekeepers, I knew exactly what I would need for the stand.  Thankful to my unwavering dedication to hopping into dumpsters and salvaging materials from the waste stream, I had everything I would need on hand.  Three heavy cinder blocks and two 8 foot long, hard wood 4×4’s.  Simple as that – place the cinder blocks on level ground spaced evenly, and lay the 4×4’s across them lengthwise.  Easy peasy.

Here they are.  The white one one the left is all the purchased equipment from last year.  The two on the right are using the deep boxes I got from my friend, and all the woodenware I made.

Here they are. The white one one the left is all the purchased equipment from last year. The two on the right are using the deep boxes I got from my friend, and all the woodenware I made.

Next I gathered all of my woodenware that I would need to properly house the bees.  Some of it was from last years start up, and the rest is as follows.  Last winter I hooked up with an old friend of mines dad who runs about 50 or so hives throughout the Minnesota River Valley and purchased 15 deep boxes from him that he had extras of.  “Big” John Crocker is a semi-nomadic hunter/gatherer, part time pastoralist who was a big inspiration in my teenage years.  His backyard full of beans and broccoli, stories of living out in the woods for months at a time, and all the Anarcho punk music I was listening too at the age of 17, set my life on a course that I am still proudly living today.

Along with the deep boxes, I knew I would need a few other pieces to complete my setup.  I spent a few weekends late this winter building the rest of my woodenware.  I started with the outer, telescoping covers.  Made out of ½ inch thick plywood, squared ½ by, and salvaged printer plates (basically just a sheet of thin aluminum) for protection against the elements, the covers turned out pretty well.  They are a bit tight on one of the boxes, but this should not present too many problems.

Working our way down the hive, is the inner cover.  This is one piece of equipment that is truly an experiment.  Taking an idea I saw David Heaf talk about in this video, I decided to use a starched piece of burlap instead of an actual plywood inner cover.  This is a traditional warre’ hive component, and it should lend itself well to the langstroth hive as well.  Basically it keeps the bees from propolising down the outer cover to the hive body.  Another possible advantage may come due to the nature of the burlap.  Being that it is made up from fiber, rather than wood, there is a good chance that it could help regulate, and absorb excess moisture in the hive.  This is more of an issue in winter, but still, a dry home is a happy home, free from molds and fungus that could be detrimental to the bees overall health.

The last piece of hive equipment I built was the screened base.  I ended up designing this myself and so far I am very happy with how they are working.  It is pretty much standard practice these days to use a screened bottom board, when the bees groom themselves and knock off the dreaded varrao mites, the mites fall through the screened bottom and are not able to reattach themselves back onto the bees.  The problem I have with most of the commercially made ones is that they are two pieces and quite expensive to purchase.

Recent trials from a lot of beekeepers is to still use a screened bottom, but get rid of the second piece, the solid bottom board.  This is the route I have gone with 2 of the 3 hives I have this year.  Ross Conrad, who is one of Americas leading voices in natural and organic beekeeping (and I had the honor of taking a day long class from him this last winter) uses a similar setup like the one I am describing.  The idea is that it allows for adequate airflow and ventilation making it easier for the bees to regulate their temperature and humidity within the hive.  In the winter I may stuff the bottoms with a bit of straw for a bit of insulation against our traditionally harsh winters, but they would still be able to breathe.

Aside from the actual cost of the bees, the screened bottom bases were the most expensive part of this project thus far.  The screen that you need to use is quite hard to find and pretty expensive.  You need to find ⅛ inch hardware screen.  The ⅛ inch size is important, it is small enough to keep the bees contained, but allows the varroa mite, and other hive debris to fall through.  A fifty foot roll ended up costing me around $55, and I should end up being able to make around 40 of them if I remember my calculations correctly.  I can only hope to someday be running 40 or more hives with all of my homemade hive bases!!

One last piece that I made, but not so much a permanent part of the hive is what is called a boardman feeder.  It is a feeder that slides into the bottom opening of the hive and allows the bees to access supplemental feed without going too far.  Opinions differ quite a bit about how well these work.  Some people have said that the boardman feeder promotes robbing between hives, especially if you have any Italian bee genetics going on in your apiary, but I thought it was worth experimenting with.

Now as a side note, I am not a huge fan of feeding bees supplemental feed, but it does have its place and time.  At some point I am sure I will delve deeper into the topic of supplemental bee feeding, but for now this is what I do, and once again, Ross Conrad is to thank for this idea.

Typically people will make up a simple syrup to help establish a new colony, or to help feed them in the fall because they robbed too much of the bees honey.  The syrup can be anywhere from a 1:1 or 2:1 ratio of cane sugar and water.  White cane sugar is important for a few reasons.  While it seems counter intuitive that a highly processed product would be better for the bees, it is the fact that there are no other ingredients going on other than sucrose.  This mimics, in a very generic way, honey.  Also, never use white sugar derived from beet root.  First and foremost, beets are grown with a huge amount of chemical inputs, and secondly, a large percentage of American grown beets are GMO – lets try and stay away from that.

To go along with the simple syrup, Ross Conrad advocates that when you do have to feed your bees something other than the honey they make for themselves, it is important to try and fortify your simple syrup with a few bee healthy adjuncts.  Rather than using just plain water for the base, first make up a tea that includes chamomile, thyme, and nettles (the last one is my addition).  Along with that add a pinch of high quality, unprocessed seas salt, a splash of cider vinegar (organic if you can find it), and a drop or two of lemongrass oil.  All of these add trace minerals that are lacking in just a basic simple feed, and they also help to mimic nectar by making it more appealing to the bees.

Here I am installing a frame of bees!

Here I am installing a frame of bees!

So I have covered a lot here.  It has been very exciting getting bees again after I lost mine back in March.  I think nucs are the way to go when it comes to purchasing bees, but they may be a bit harder to find (versus a 3 or 4 pound package that you can get through the mail) if you do not live near to any beekeepers who put these together in the spring.  One other drawback, and this is less of a criticism of Rushfeldt Apiaries, as it is just the truth, at least one of the colonies I purchased had a significant amount of wax moth larva presence, and another has(d) evidence of small hive beetles.

The wax moth larvae are relatively common pests for bee hives, and as long as the colony is strong and hygienic, they can fight their way back to a clean and healthy hive.  I am a bit more concerned about the small hive beetle, as I have never seen them before.  They are typically only found in the southern parts of the United States, and because my nucs originated at least in part in Florida I am not surprised.  I will keep monitoring for these, as well as the varrao mite and will take the proper action if and when necessary.

If this post or any of my other ones has not proved what can be done and built using salvaged materials, let me remind you.  Almost all of the materials used so far in this year’s construction of hive equipment was free and rescued from the waste stream.  The burlap was sourced for free from a local coffee shop, the aluminum printing plates were purchased for scrap value from a local printer ($5 for about 25 sheets, and will make one hive top for each piece), and once again, all the lumber was free from various dumpsters and industrial sites.  The only true expense for new materials was the ⅛ inch hardware screen, and small nails that I needed.

It was important for me to keep the costs down for a few reasons.  First, keeping bees is expensive.  There are many costs that can accumulate quickly if you are not careful.  Secondly, I really want to figure out how to make this into a part time living, and if I am to do that I have to figure out ways to make it more affordable.  Making my own equipment is one way to do that.

So finishing on that note, there is a lot going on with the bees this year.  New bees, new equipment, and a new location – my backyard.  This is going to be a good test to see if a year of trial and error, subsequent research and hard work can pay off!  The bees are in a bad place globally and I want to play a small part in trying to change that.  I will keep you updated my friends!!  Peace & Cheers

Update as of Monday, 6-10-13 – Today I checked the bees and found a few surprising things.  First, the white hive is not doing very well.  I am still trying to figure out if it is being affected by disease or some other malady.  It may be that the queen just sucks.  Very few eggs, not much brood, and many dead bees within their cells. Quite a mystery??

The middle hive, which I have dubbed the brown hive is doing great.  I have added a second deep box, the bees are drawing out lots of new comb, and they are making lots of honey.  Lots of high hopes for this one!!

The pink hive was even more surprising today.  Pink is almost as robust as the brown one, but just a bit behind in all regards – less bees, less new comb, but still very healthy.  But I guess they were feeling a little cramped and decided to start building some queen cells in preparation for swarming.

Once I realized what was happening, I took immediate steps to try and prevent the swarm.  The hardest part was locating the queen.  She has been very elusive so far, but finally I caught site of her.  I isolated the frame she was on and began to do what is called a walk away split.

I essentially removed the frame containing the queen cells along with three other frames of capped brood, eggs, honey, and polllen and placed them into one of my swarm traps.  The idea is that the queen(s) will hatch, vie for dominance, and then go on their mating flight.  If all works out, I will have a new colony of bees directly related to the pink hive.  

Never doing this before, I am quite nervous as to what may happen.  The potential is there for adding another strong colony that could replace my weak one.  It could also backfire, and I end up with another weaken colony.  I will know in a few weeks, stay tuned!!!

Read Full Post »

garden

Workin in the garden …

I have ruminated enough times on this blog about climate change that it would no longer pop up its ugly head, and yet it never ceases to amaze me as to how well it lends itself to a quick article.  As homesteaders, so many of our daily activities lead to the out-of-doors, and therefore keeps us connected to nature and all her changing faces.  As an example, currently we are in the middle of a week long rainy stretch (not so unusual for this time of year), but on May 14 (more than a couple days ago), we had high temps in Minnesota ranging from the mid 90’s (Fahrenheit) all the way up to 102 at my friends Permaculture farm an hour and a half south of town (a bit early for temps like that).  Three days earlier we had close to freezing temps in the morning and freezing rain on and off throughout the first half of the day.  A week or so prior to that we had a significant snowfall which followed one of the most perfect, 80 degree, bug free weekends I have ever experienced! Talk about extremes!

Cherry Blossoms!

Cherry Blossoms!

All of this occurred in roughly the last three weeks, a time that can be traditionally summed up with the old adage “ April showers, bring May flowers.”  This year everything is mixed up, and a bit delayed.  The dandelions are just starting to bloom, as are the haskaps (honeyberries), Creeping Charlie, Lilacs, and for the first time, our multi-cultivar plum tree that I have lovingly named “Plumsy”!

Plumsy now has about 17 varieties of plums and apricots grafted onto him, and if all the blossoms get pollinated, set fruit, and survive through harvest time, I can expect to taste Mount Royal, Pipestone, Red Cherry Plum, and Superior plums for the first time!  I have only had a tree ripened plum at my father – in – laws, so this is exciting and something to look forward to!

Keeping on the theme of fruit trees and grafting, the 2013 preliminary results are in.  A lot of grafting has been done and I am highly optimistic for the success rate this year!  After much trial and error, I have officially switched back to the whip and tongue method of grafting for most of my work.  Last year I used the cleft grafting method and had decent results, but the whip and tongue, when executed properly, makes a much stronger graft union due to more cambium layer contact between the scion and the stock.

A bucket full of prunus grafts!!

A bucket full of prunus grafts!!

I started out all this years grafting with the rootstock.  29 apples, 20 plums, 5 apricots (apricots can use the same rootstock as plums) and one Shipova (sorbus x pyrus) grafted onto a sucker root I dug up from my Ivan’s Belle Russian Rowan.  I will hopefully know by July which grafts take and then can start planting out trees, or prepare a winter nursery area for the ones that are to be planted or sold next year.

Now onto the monsters in the family!  As I mentioned earlier, Plumsy now has close to 17 varieties of plums and apricots.  I added two European plums – Imperial Epinuese and Kuban Comet to help pollinate the Mount Royal, a bunch of American x Japanese plums, and two apricots – Apache and Black.  Last year I had a 100% success rate with grafting onto to Plumsy, hopefully I can repeat that again this year.

Next is the infamous Son of !Frankentree!  3 years ago I started grafting onto a Haral-red apple tree.  That first year only one graft took, but I kept at it and last year added 20 varieties and had about a 90% success rate.  This year I added another 20 or so varieties and time will only tell, this fall I may have an apple tree with close to 40 varieties grafted onto Son of Frank!

Continuing with plant propagation, I tried a few other experiments in the last few months with varying degrees of success.  I obtained a number of berry cuttings this winter (aronia, currants, elderberries, gooseberries, and haskaps) and continued with trying to root these.  Most of the currants are doings pretty well, as are the elderberries, but the aronia and haskaps were complete failures.  I am going to try again in a few weeks using green wood, rather than 1 year old growth.

Also mentioned in an earlier post is the package of chestnut seeds I received from my friend Cliff who owns Englands Nursery.  I have not had the best germination rate with these (probably because I used a grow lamp rather than the sun!) but there have been a few that have done exceptionally well.  The strongest one has found a home on the north end of my property, and will hopefully be the upper story of a future urban food forest!

The offspring out by the new coop.  Did I say offspring, I meant my kids!!

The offspring out by the new coop. Did I say offspring, I meant my kids!!

In other news, a project I first mentioned back in this post, is now functionally complete.  The new chicken coop and run was finished a week ago.  I am happy to say that this project, except for the nails and screws, used nothing but salvaged and repurposed materials – the shed, window, all the lumber, fence panels, and welded wire fencing were all garbage to someone else, and now have a new lease on life helping to house and protect my flock of yardbirds.

Along with diverting salvageable resources from the waste stream, the new coop and run is functionally superior to the old one.  Not only is it larger which will mean happier chickens, it will also be easier to clean.  Our composting area is only a few feet away so it will be easier and more efficient than what we have been doing – the beauty in a well designed system!

Aside from the freakish weather, grafting and plant propagation, and the chicken coop project, spring here at the Dead End Alley Farm appears to be winding down quickly.  Some blank spots in the food forest/orchard continue to be filled in with more apples, cherries, and plums, all my bee hive equipment is ready to go, but so far the bees I was hoping to purchase have fallen through.  Hopefully my swarm traps do their jobs and I end up with some free bees!

A quick note to all my loyal readers, this tends to be the time of year when I get too busy to write on a regular basis.  I anticipate this happening again this year, but you never know.  I will do my best to keep puttin’ my thoughts down into words for all ya’ to read, but short of that, feel free to follow me on face book and keep up to speed with smaller updates – kind of like Autonomy Acres Lite!  Also, I love hearing from my readers, so shoot me an email at autonomyacres@gmail.com if you have any questions or comments.  Until next time, I hope climate change is kind to you and yours!  Happy Growing Amigos y Amigas!!  Peace & Cheers

Read Full Post »

In the first installment of the Urban Homesteading in a Northern Climate series, we talked about the garden and some tactics and ideas that can lead to successful food production.  This week I want to continue that conversation by staying outside, and talk more about the other out-of-door spaces of a northern climate urban homestead.

It is easy for the garden to steal the show – they provide us with our sustenance, a place to escape to, and inspiration for songs and stories.  It is more difficult to find that same spirit in a wood pile or a garden shed, but does it make these other aspects of our homesteads any less important?  Certainly not!

Like the human body, a healthy, functioning homestead has many different parts and systems that complete the whole.  Where the gardens and orchard may be the heart and circulatory system, our houses as our protective skin, and the kitchen as our digestive tract, all homesteads – like our bodies, require the basics to sustain life.  These analogies of the body and a homestead are not perfect, but I do believe they do a decent job of illustrating the point I am trying to make.

So what are some of the other out door spaces that contribute to a healthy and vibrant homestead?  What are their roles and more importantly, since we are talking about the Urban Homestead here, how do we design them into the small spaces we have to work with?

Here are our two main compost bins.  The chickens' new home will be behind this area.

Here are our two main compost bins. The chickens’ new home will be behind this area.

Let’s begin with an important piece of any homestead, the compost pile.  If you are anything like me, the compost pile may be as important as the garden itself is.  Without a place to turn our organic wastes into useful fertilizer and soil amendments, we wouldn’t have fertile, thriving gardens.  We have our main compost pile located almost centered on our ½ acre plot.  We use a system of two plastic compost bins (along with temporary welded – wire compost cages to accommodate seasonal over flow of compostable material), which cycle, and compost organic waste in a rotation of first in, first out.  Because our homestead has been evolving over the last ten years, there are definite design flaws that we try to remedy as they are identified and as time permits.

One of these design flaws has to do with the interaction of our flock of backyard hens, and our compost area.  Our number one compost ingredient is bedding straw and chicken manure.  It would then make sense to have the chicken coop located in closer proximity to the compost area, or the other way around – but we don’t.  The coop sits about 35 feet from the composting area, which really isn’t that far, but it is far enough when you are hauling bedding straw and chicken manure to be composted, and when you have limited space to utilize.  This design flaw will hopefully be corrected this coming spring as we have plans to move the chicken coop and run right next to the composting area.

Another big advantage we will gain by moving the chickens closer to the compost area is that they will also be much closer to where we have one of our garden sheds located.  This rickety old shed acts as a garden tool storage area, and where we store all of our fresh bedding straw.  When we buy bales of straw from the farm supply store, we purchase upwards of 15 bales at a time for three reasons – we get a price break at that amount, we only drive down to the farm store 2 – 3 times a year (for bulk, raw grains for chicken feed, and straw), and because that is how many bales of straw my trailer can accommodate in one load.

Here is the rusty, old shed!  A home for garden tools, bedding straw, and probably some lucky mice!!

Here is the rusty, old shed! A home for garden tools, bedding straw, and probably some lucky mice!!

With the erratic weather patterns and the on going drought that America has been dealing with for the last few seasons, having a place to securely store an expensive input like straw is important.  While we don’t run a huge operation, knowing that we have 6 months to a years worth of straw stored in a dry place saves us money and time, and also adds a small bit of resilience to our homestead.  I’d rather not import and spend money on a product like straw, but the simple fact is that I have too for right now, so having the infrastructure to properly store such a great source of compostable carbon is vital – even if it is a rusty old shed!

Continuing on the importance of outbuildings, we have one other shed, and a detached garage that are a part of our homestead.  In the urban setting, a garage and/or sheds can help take the place of barns, machine/work shops, corn cribs, and granaries.  Once again, here at The Dead End Alley Urban Farm (the commercial arm of the Autonomy Acres blog) we have another design flaw.  This one though is not so much a flaw on the location or the structure itself, but of operator error!  I am a collector of “useful materials”, or a less sexy way of putting it, a modern day scavenger!  My habit of finding and then diving into dumpsters (or spotting cool stuff along boulevards) has yielded me vast amounts of lumber, fencing, firewood, windows, 55 gallon barrels, and many other useful, and random pieces of urban “waste”.  Because of this, our small garage, two sheds, and yard have turned into a BIG mess!

I am not ready to abandon my habit of picking up useful materials, but I do have to figure out better ways of storing the materials I collect.  Another project on the “to–do” list is to organize all the lumber and other random materials I have collected, and store them in ways that make them easy to inventory and even more easy to utilize and build with!  If this can be accomplished, I can actually turn my small garage into a workshop that can then be used for making hive bodies and other beekeeping equipment, rain barrels, compost tumblers, and other DIY projects that I have going on or want to start!

Moving away from outbuildings, but staying on the theme of utilizing the urban “waste stream”, is fire wood.  For the last two years, and periodically over the last decade,  I have been able to heat my house with wood scavenged from neighbors’ yards, storm damaged trees left on the cities’ boulevards, the county compost site, and trees cut from my own land.  In a typical Minnesota winter, that equals a lot of wood – at least two full cords of split, dried, and stacked firewood per winter season.  Now this is one place where our design is almost perfect!  Our spot for storing and chopping wood that is ready to burn is right out our back door (this same spot also doubles as an area to hang clothes out to dry in the summer!).

The Wood Pile!!!

The Wood Pile!!!

As funny as it sounds, this is one of my favorite out door spots in the winter.  There is something about heating my house with wood that helps me keep in contact with the Earth and the realities of human comfort.  I love the feel of the ax or the splitting maul in my hands as I chop wood, and I like knowing that MY physical labor not only helps to keep me a bit healthier, but also helps to keep my wife and kids warm when it is cold outside.  One improvement that could be made however, and will be once time allows (surprise, surprise!), is adding some kind of semi – permanent, roofed structure to help shelter our firewood.  Currently it is just covered with a tarp, but by having a real roof to protect it, we not only benefit from dry firewood, we also add another roof surface to collect rain water from!

Everything covered so far is really only the tip of the iceberg as far as outdoor spaces are concerned.  The possibilities are endless when it comes to designing and implementing ideas for our outdoor spaces!    This is a topic that whole books could be written about, so one blog post does not do this subject justice.  Other areas of importance that all homesteads should at least consider and implement when practical and possible are spots dedicated to catching and collecting rain water, sites for grey water systems, areas for livestock – chickens, rabbits, goats, bees, etc…, summer kitchens (cob and masonry wood fired ovens, solar ovens, and rocket stoves come to mind – oh yeah, and a place to BBQ and smoke meat), areas for drying and curing produce, out door bathroom facilities including composting toilets and solar showers, and entertainment spots like decks, porches, an area for a bonfire pit and even a bit of a lawn for playing bocce ball!

Just like everyone’s body is a bit different, every homestead is unique.  Where we live and what our interests are will play a big role in how we design and setup our outdoor spaces.  Obviously if you live in a spot like southern California or Florida (or some other equivalent warm climate), heating your house in the winter is not going to be a big priority, and if you really aren’t into keeping bees or other livestock you won’t have to work that into your design either.  But as homesteaders – whether in warm climates or cold, in the country or the city; it is our similarities that connect us, and lead to our ultimate success.  So while it is the outside land where we grow our food, raise our animals, and store building and other such materials, it is the home that brings it altogether!   And that is where we will pick up this conversation next time we talk about the Urban Homestead in a Northern Climate – The Home….  Peace & Cheers!


Read Full Post »

“I have been called a pioneer.  In my book a pioneer is a man who comes to virgin country, traps off all the fur, kills off all the meat, cuts down all the trees, grazes off all the grass, plows up the roots and strings ten million miles of wire.  A pioneer destroys things and calls it civilization.” – Charles Marion Russell – Cowboy Painter

How often do we think about garbage? What is being thrown away? How much of it and why is it being discarded, and where is it going to end up? It is easy to overlook these aspects of garbage for many reasons. Things like , “Garbage isn’t sexy” or “I am too busy to think about garbage” may come into our minds. But the real culprit to why we try and ignore the questions of garbage is that we have been conditioned to. This conditioning is a manifestation and direct result of our reliance on seemingly endless supplies of cheap fossil fuels.

It is these supplies of non – renewable fossil fuels that have formed the foundation for our hyper – capitalist, unlimited growth, disposable culture. It is the very nature of this system to produce, consume, throw away, and repeat. This process started in earnest with the dawn of the industrial revolution and the harnessing of the energy locked within coal – it only gained speed with the advent of oil!

Prior to the industrial revolution, and even in its earliest stages, goods for sale and trade were manufactured by artisans, craftspeople, farmers, and wives in their homes, kitchens, and workshops. With common hand tools and in some instances a selection of simple machines, most anything that one would need could be made or repaired in almost any community using a majority of local raw materials.

The blacksmith, the cobbler, and the cooper were all trades that were an indispensable part of the local economy that was based in towns and villages. Because so many of these pre-industrial goods could not be mass produced, most were built extremely well, and could be repaired when the time came. As an example, when someone bought a pair of boots, it is quite possible that those boots could last throughout their entire adult life. With the proper care (polishing and oiling), and the occasional re-soling of those boots, the idea of throwing them out would have seemed ludicrous to the owner of that pair of boots.

Another distinct difference between the pre -industrial economy and today’s disposable economy, is the role that people play. It is true that history is ripe with examples of human rights abuses and economic injustice, but we don’t have to look too far in today’s world to see these same traits as well. The life of a pre – industrial human was by no means glamorous, easy, or convenient. On average, people tended to die a bit younger, and because they did not have fossil fuel energy slaves doing the “heavy lifting”, much of the work was more physically demanding. But it is my contention that the blacksmith, cooper, or farmer from 300 years ago had more meaningful work than we do today and probably a better understanding of what it means to be human.

Today’s fast paced, “throw away” culture has stripped us of our humanity, and has reduced us to interchangeable and disposable cogs in a machine, and numbers on a spreadsheet. In a world of super computers and robots, very few physical skills, talents, or trades are needed anymore. Only the ability to follow directions and push a few buttons will see you through your 8 hour shift. Not only is this an insult to our humanity, it is also a waste of our inherit abilities and talents as sentient beings. From the time people started climbing down from trees and walking on two legs, we have been creators. Cave paintings and tools, fire, story telling, agriculture and religion – all of these are human inventions. Some good, some bad, some indifferent – but only in today’s world are any of these things disposable.

It is a sad reality where we find ourselves. Disposable people dying in a disposable, dying world. So little remains of what once made us human, and what made the Earth sacred. We have disposed of our great forests and endless grasslands. Spoiled the oceans and the sky. We have traded what it means to be human for “progress” and “convenience”, and now find ourselves lost, looking for something that can once again give us meaning in our lives.

Here is the lumber I dumpstered!!

Here is the lumber I dumpstered!!

The inspiration for this article came to me this last week. While it has taken on it’s own narrative, and has gone places I had not originally intended to go, I feel it does a good job of summing up the tragedy of a disposable culture. Last weekend while running errands, and picking up supplies for a project at home, I came across a dumpster at a doctor’s office that was being remodeled. What caught my eye as I was driving by was a 2×4 sticking out into the sky. Being a sucker for free lumber, I pulled up, climbed on in to the dumpster, and could not believe my eyes. As far as dumpster diving standards go, I just jumped into a gold mine. By the time I was done sorting through all I could, I ended up with 8 – 8ft. 2x4s, 6 – 6ft. 2x4s, 5 – 12ft. 2x8s, 1 – 4ft.x8ft. sheet of plywood, 4 – 2ft.x8ft. sheets of plywood, a brand new gallon bucket of joint compound for drywall, ½ inch finishing trim (lots), and a brand new plastic garbage can. There was even more stuff in the dumpster – industrial wooden doors, more plywood that I couldn’t get to, metal drywall corners, acoustical sealant (never opened), an old computer, and probably other things I didn’t even see.

This dumpster exemplifies our disposable culture. So much gets wasted that still has value. So much could be saved if we changed our habits and opened up our minds. So much needs to change if we hope to continue inhabiting this planet. Now, I know I am not alone when it comes to dumpster diving and salvaging old/new building materials and other useable items. There are plenty more of you out there who aren‘t afraid to jump into that dumpster, and I raise my beer to you. I realize dumpster diving is not going to save the world, but it is a start. And now I have enough brand new 2x4s to frame out a new wall in a home remodeling project, and enough plywood for making bottom boards and covers for beehives. It is truly awesome saving things from the waste stream, and giving them a new life! Peace & Cheers!!

I started this article out with a saddening quote from the great American painter, Charles Russell, I will finish with a video my friend Little John made about a free store in Washington state that is keeping useful things from going to the land fill!!

Read Full Post »

Hey everyone!  A big heads up to anyone who is in the Twin Cities, Minnesota, Iowa, Wisconsin or other upper Midwest locations.  Some dear friends of mine are putting on a great event called the Gathering of the Guilds.  It is a chance for people to get together and talk gardening, permaculture, food justice and many more things. Please refer to the info below for details.  Hope to see you there!!  Peace & Cheers …..

Gathering of the Guilds – 3 Days of Permaculture Skill-shares, Workshops and Networking

September 14-16, 2012

At Harmony Park Music Garden (79503 298th St., Clarks Grove, MN 56016) Open Map

Gates open at Noon on Friday – Come early to set up your camp and help us create the event.

This is a COMMUNITY CREATED EVENT.

We will provide the infrastructure and logistical planning-YOU provide the knowledge. ALL SKILL LEVELS ENCOURAGED. This gathering will offer local permaculturists, farmers, gardeners, activists, and others a chance to spend a weekend sharing skills, making connections, and learning.

WE NEED YOU to facilitate a workshop or share a skill. Some ideas include:

  • Sheet Mulching
  • Animals in Permaculture
  • Hugelkulture
  • Composting
  • Urban Permaculture
  • Bees and Pollinators
  • Mushroom Cultivation
  • Vermiculture (Worms eat my garbage)
  • Seed Saving
  • Freezing, Canning and Drying
  • Fruit Tree Grafting
  • Humanure
  • Tree Pruning for Tree Health
  • Wild Edibles Walk
  • Grey Water Systems
  • Rainwater Catchment, Storage and Use
  • Seed and Plant Swap (Bring your extras and bring home some new additions)

This is a family friendly, drug and alcohol free event. There is onsite tent and RV camping, a Community Kitchen to provide 6 meals (bring your garden surplus to contribute), a kids space with ongoing activities.

We request a $20 donation to cover toilets, kitchen staples, and site rental.

NO DOGS!

NO OUTSIDE FIREWOOD!

For questions or to R.S.V.P please email:

gotg2012@centerfordeepecology.org


Read Full Post »

As the old saying goes , “One man’s trash is another man’s treasure”, is more or less my personal motto and I am the first to admit that I have a love affair with dumpsters and discarded items.  I have found many useful things in dumpsters and by the side of the road that were destined for the landfill – quality lumber, a multi tool (I use this everyday), chain link fencing, shovels, fire wood, a bike trailer, a great hand saw, five gallon buckets and too many other things to list them all.  This love affair of mine, saving discarded items, comes from two places from within me – the thrifty anarchist and being a good steward of the Earth.  I work hard for the money I make and I don’t like spending it on useless shit if I don’t have to, so when I find something useful that won’t just collect dust in my garage for the next ten years I usually take it.  Some examples: the chicken coop I built is made out of all salvaged lumber, our chain link fence is 95% salvaged, old window screens that I use for drying garlic and herbs on, etc…  Not only does this habit save me money, it also prevents perfectly useable materials/tools from going into the land fill.  The sad fact is this – the majority of Americans live a disposable lifestyle.  Fast food, cheap plastic products, and instant gratification.  If you want something now you can go out and get it, and when you are done with it or when it breaks just throw it away and it is gone – out of site, out of mind.  Living this lifestyle allows us to not take responsibility for our actions or our planet.  Nobody is perfect (including me), but at some point this behavior of a throw-away lifestyle needs to be addressed.  As we enter a cheap energy challenged future (Peak Oil), products that we take for granted are going to become more expensive and more scarce.  The earlier we can start to voluntarily change our habits, the easier this transition will be. So now, onto to a real world example… garden hose repair.  On my way home from work today I spotted a nice looking garden hose in someone’s garbage.  I stopped to check it out and see if it was worth taking.  It appears this person must have had this garden hose to close to their bonfire and ended up burning it.  Aside from a semi-melted six inch section, this hose was in great shape.  I threw it into my car, drove to the hardware store, and purchased the hose repair kit that I would need to fix it.  I bought a few extra pieces just in case the hose had more than one leak, and all said and done it cost me about $12 in repair parts – far cheaper than buying a new garden hose.  I am glad I bought extra parts, it had a second leak and on further inspection the people also must have ran over the female end of the hose with their car tire trying to put out the fire because they burned their hose (it must have been a great bonfire)!!  What follows is the incredibly easy process of fixing a leaking garden hose.  It will save you money on buying a new one, and it will help (at least temporarily) of the hose going to the land fill.  And remember, there are many treasures to be found in the discard pile, you just have to look with a different set of eyes – Happy dumpster diving!!  Cheers!

Here is the garden hose in question - "What were you doing the night of the bonfire?"

Here are the parts you will need to rebuild a garden hose - male and female ends, and also barbed hose couplers and clamps to fix mid hose leaks.


The burned section of the garden hose has been cut away.


Using a little WD-40 to lubricate the barbed coupler, the garden hose has been put back together.


Here is the finished fixed garden hose. This should last for atleast a few more years before you have to mess around with it again.

Read Full Post »

Here is a photo back from August or September, fresh Burmese Okra ready to cook!

We are a week away from Christmas, buried in close to twenty inches of snow, temperatures that are hovering at about 5 degrees above zero, and here is a post about one of my favorite summer vegetables to grow, Okra. Okra or hibiscus esculentus (according to the 1975 printing of Rodale’s How to Grow Vegetables and Fruits by the Organic Method) is a native to warm and temperate climates, but here in Minnesota, it can be grown as an annual. Being a relative of the Hibiscus, okra has beautiful flowers and is a wonderful addition to the garden and a great source of nectar for all the honey and bumble bees. I first started growing okra as an experiment in one of my first gardens when I still lived with my parents. Since then, I have come to love this exotic, warm climate vegetable and have learned many different ways of preparing the young tender seed pods. In no particular order our family really likes pickled okra with dill and garlic, okra dredged in cornmeal and fried in bacon fat, okra and tomato vinaigrette salad and, okra used in a southern style gumbo stew (seafood, chicken, sausage, vegetables etc….). One trait of okra that I really enjoy is the ease of growing and caring for the plant. The only tricky thing I have found about okra, is getting it to sprout. In our cooler Minnesota spring, it is absolutely necessary to start the seeds in warm soil, and if you are starting them indoors and transplanting the seedlings be careful, okra seedlings are very sensitive, and the roots do not like to be disturbed. However, once your patch of okra is established, there is very little you have to do to insure a decent harvest. Due to the fact that okra originates in warm climates (the jury is still out on exactly where – either Africa or Asia), it can handle hot temps and to some extent drought. Until this year, our okra also seemed immune to pest problems until the Japanese Beetle developed a taste for our Clemson Spineless okra leaves. I try to fortify my okra patch with at least a little compost and I always mulch with straw, leaves, or grass clippings. We usually don’t start harvesting seed pods until the end of July or early August, but once they start coming in (and also depending on how many plants you have in the ground), you can expect at least one main dish of okra per week. It is essential to harvest the seed pods when they are young and tender, once they start getting more than about four inches long they start to get quite fibrous. This last season we planted Clemson Spineless and Burmese, for a total of probably thirty plants. The Clemson Spineless was the early producer, but the Burmese was the heavy producer. So heavy in fact that we did not keep up with fresh eating or pickling, hence writing about okra at the end of December. Due to the amount of harvested, dried seed pods we have had sitting in our kitchen for the last three months, and having no need for saving that much seed, we finally tried a new use for okra seed.

Okra seeds!

The mature okra seed can be roasted, ground and then brewed up as a coffee substitute. I started this process by first cleaning all the large, woody pods of their seeds. After collecting about a pint or so of seeds, I soaked them for about ten minutes in warm water. While the seeds were soaking I set our largest cast iron skillet over high heat and let it start heating up. After about ten minutes of soaking I drained the cleaned seeds into a colander and let them drain for about five more minutes. At this point, the skillet was very hot and I added the drained okra seeds. Initially there was a bit of steam but that dissipated quickly and the seeds started their adventure of being roasted. Constantly stirring the seeds, it took at least ten or fifteen minutes of roasting before I started to hear some popping and to see smoke. Once this started to happen I went for another ten

Fresh brewed Okra "Coffee"!

minutes with almost constant stirring. Due to the fact that most okra seed is naturally dark, I did not notice much of a color change, but the aromas were wonderful. Roasted okra seed has an aroma somewhere between roasted popcorn and roasted pumpkin seeds – kind of nutty and slightly burnt. Once they were cool to the touch I put them in an uncovered mason jar and waited one day before grinding them up. I did this to let them breath and get rid of any overly harsh flavors that might have developed from the roasting. The next day we ground up the seeds, filled up the small Italian percolator and brewed up a batch of Okra “Coffee”. To be fair, it is nothing like true coffee, but as far as a warming beverage it is very good and very earthy. I added a fair amount of honey and a bit of cream and really enjoyed the end result. It is fun having another way of using a favorite plant and always good to not waste more than we have to. Okra seed “Coffee” will never replace coffee or Earl Gray tea for me, but it is good and I will continue to do this from now on. Give it a try if you ever find yourself with extra okra seed and enjoy a new warm beverage. Cheers!

Read Full Post »

Charlie the cat checking out the new potato tower.

Welcome to the first installment of the potato tower series.  The idea of the potato tower is nothing new and there are many variations on the design.  This first one that I am showing is constructed out of all dumpstered lumber.  The design is very simple.  You need four verticals, 2×4’s, 4×4’s,  any sturdy lumber should work.  And for the horizontals you will need something a little wider and a little thinner.  The pieces I  have are about four inches by a half an inch.

The spuds are planted and mulched with leaves. As they grow, add more soil, mulch and boards to hold everything in.

I am using pine, so as far as long-term use, I will get a few seasons worth of use before they start to rot.  Using cedar or redwood would be a great choice if you don’t want your potato tower to rot, but purchasing these two woods is expensive and not very environmentally sound.  An alternative is to find a fencing company and see if they have cedar scraps. Fencing companies typically have a dumpster area open to the public, so you might be able to find pieces from an old fence.

The idea behind a potato tower is very simple.  potatoes will constantly keep producing more tubers as their stems get covered in soil.  This is why you typically dig your potatoes deep, and also hill them throughout the season.  The potato tower is taking

Red Norlands that want to be planted!

this idea to the extreme.  As the shoots start to emerge you let them grow to a height of six to eight inches.  At that point add more compost and soil leaving just two inches or so of vegetation showing.  At the same time as adding more soil and mulch to cover the plants, add more horizontal boards to hold everything in.  Remember to leave a little space between horizontal boards so excess moisture can escape and also so you can steal a few spuds now and again.  Repeat this process throughout the season.

From the research I have done, potato towers can dramatically increase your harvest of spuds.  The amount you can grow in less space is almost exponential. At the blog  One Straw , they get close to a hundred pounds of spuds per tower.  I hope I can get results like that.  In this first tower, I planted Red Norlands saved from last year.  I put ten, nice sized potatoes into the ground that were ready to be planted.  I will be making at least three more towers that will be made out of 55 gallon drums.  That article will be coming soon.  Until then, Happy Spring and Cheers!

Read Full Post »

Bales of Hay and old patio windows will help to start our garden early!

As stated in the last post, spring is near and inspiration and old ideas are flowing fast.  Remembering that I have two old patio door windows, and seeing this post a while ago at One Straw, I figured it was time to build another cold frame.  I scored these windows a few years ago after a friend told me he saw them for free on a boulevard.  That year we built a very similar cold frame, but much later in the year.  It is March the seventh, it is in the mid forties, and the sap is finally starting to run and we are going to start gardening soon.

The basic construction consists of ten bales, preferably straw, but hay will work also, two patio door windows with the frames removed, one eight foot long one by four as a center support, and a piece of lumber 12-14 inches in length as a vertical support for the eight foot length of one by four.  Keep in mind this design was built with what I had on hand and can be adapted to what ever materials you have that will work.

On the left is the cleared out foot print in our garden. On the right is another picture of the DIY cold frame.

On the left is the temp when the thermometer was first put into the cold frame. On the right is one hour later and more than 12 degrees warmer, AWESOME!

I started by clearing out as much of the snow as I could and creating a foot print for the cold frame to sit in.  After that it was placing the bales in the cleared out area with a few final adjustments.  I ran the eight foot length of one by four down the middle of the cold frame and supported it by another piece of wood as a central support for both of the windows.  The plan for the cold frame has two objectives: 1)  To start salad mix and spinach within the next week-week and a half, and 2) to act as a green house for the first of our seedlings that have been started under an indoor light. 

Ideas such as cold frames and green houses are great ways of extending our growing season, especially up here in Minnesota.  As always there will be more posts on the cold frame and the green house and how these simple ideas will be helpful to all of us as we enter a world where we all need to be more responsible for where our food comes from.

P.S. As of press time, it is now 72 degrees in the cold frame!

Read Full Post »

Older Posts »